


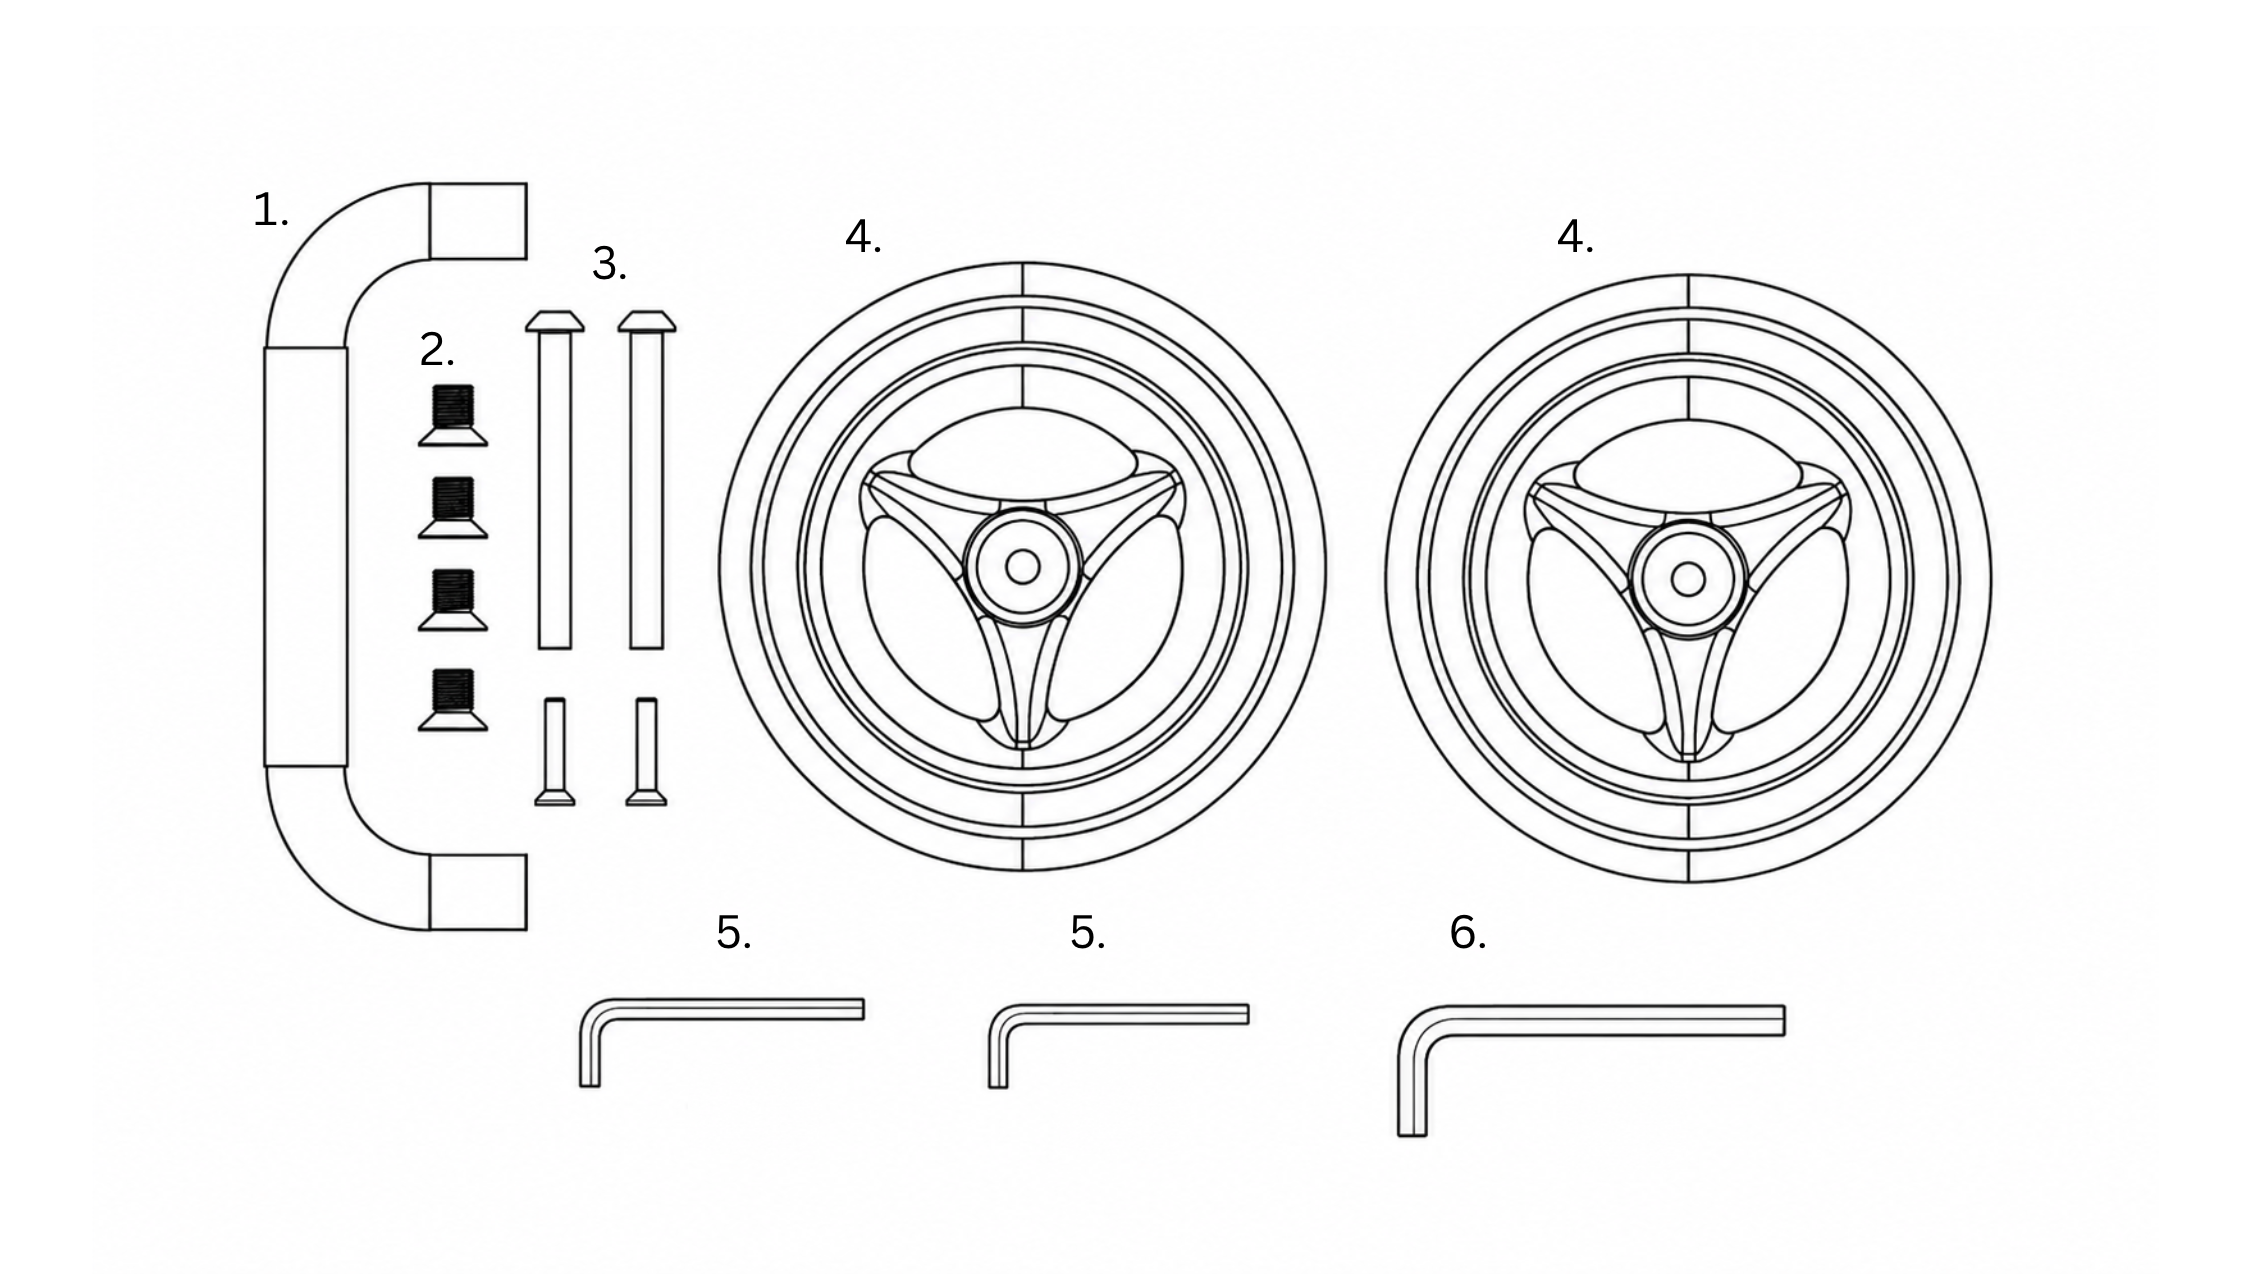
Parts checklist
Check off each part as you unpack
-
1. Foot Bar with Silicone Wrap
X1
-
2. Large M8 Countersunk Bolts
X4
-
3. Axle Bolts
X1
-
4. Wheels
X2 (each with bearings and a spacer pre-fitted)
-
5. Small Hex Keys
X2
-
6. Large Hex Key
X1
Inside your parts box

Assembly Instructions
Follow these steps to assemble your trolley
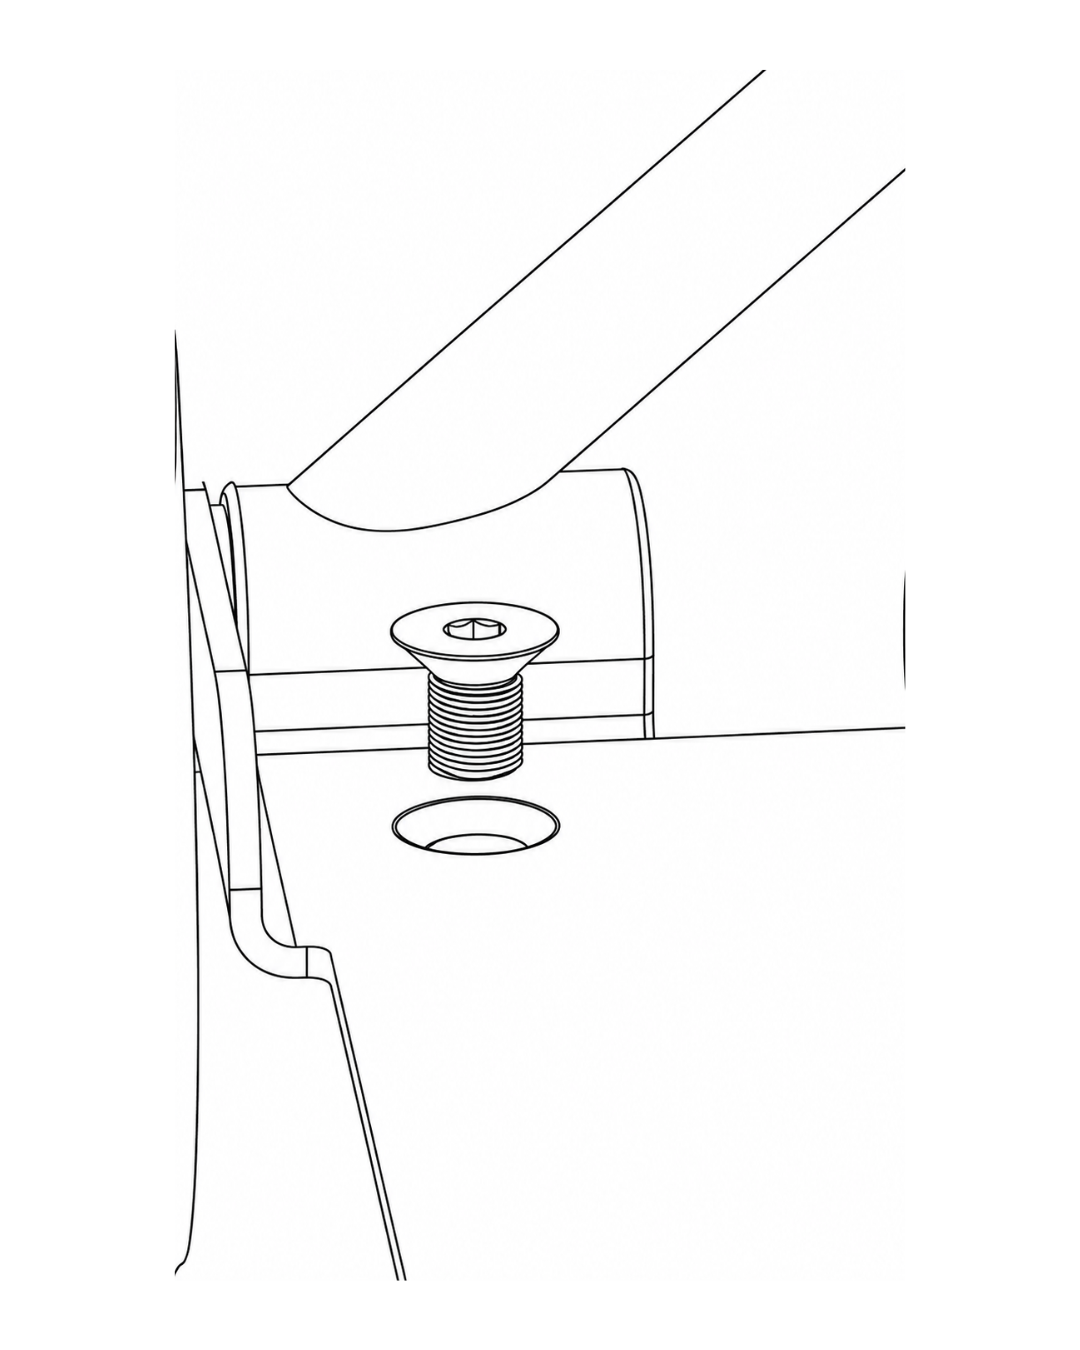
1
Attach the foot bar
Take the foot bar (the curved bar with the silicone wrap) and position it at the base of the frame. Secure it using 2 of the M8 countersunk bolts and the large hex key. Tighten until the bolt heads sit flush.
Large hex key
2x M8 countersunk bolts
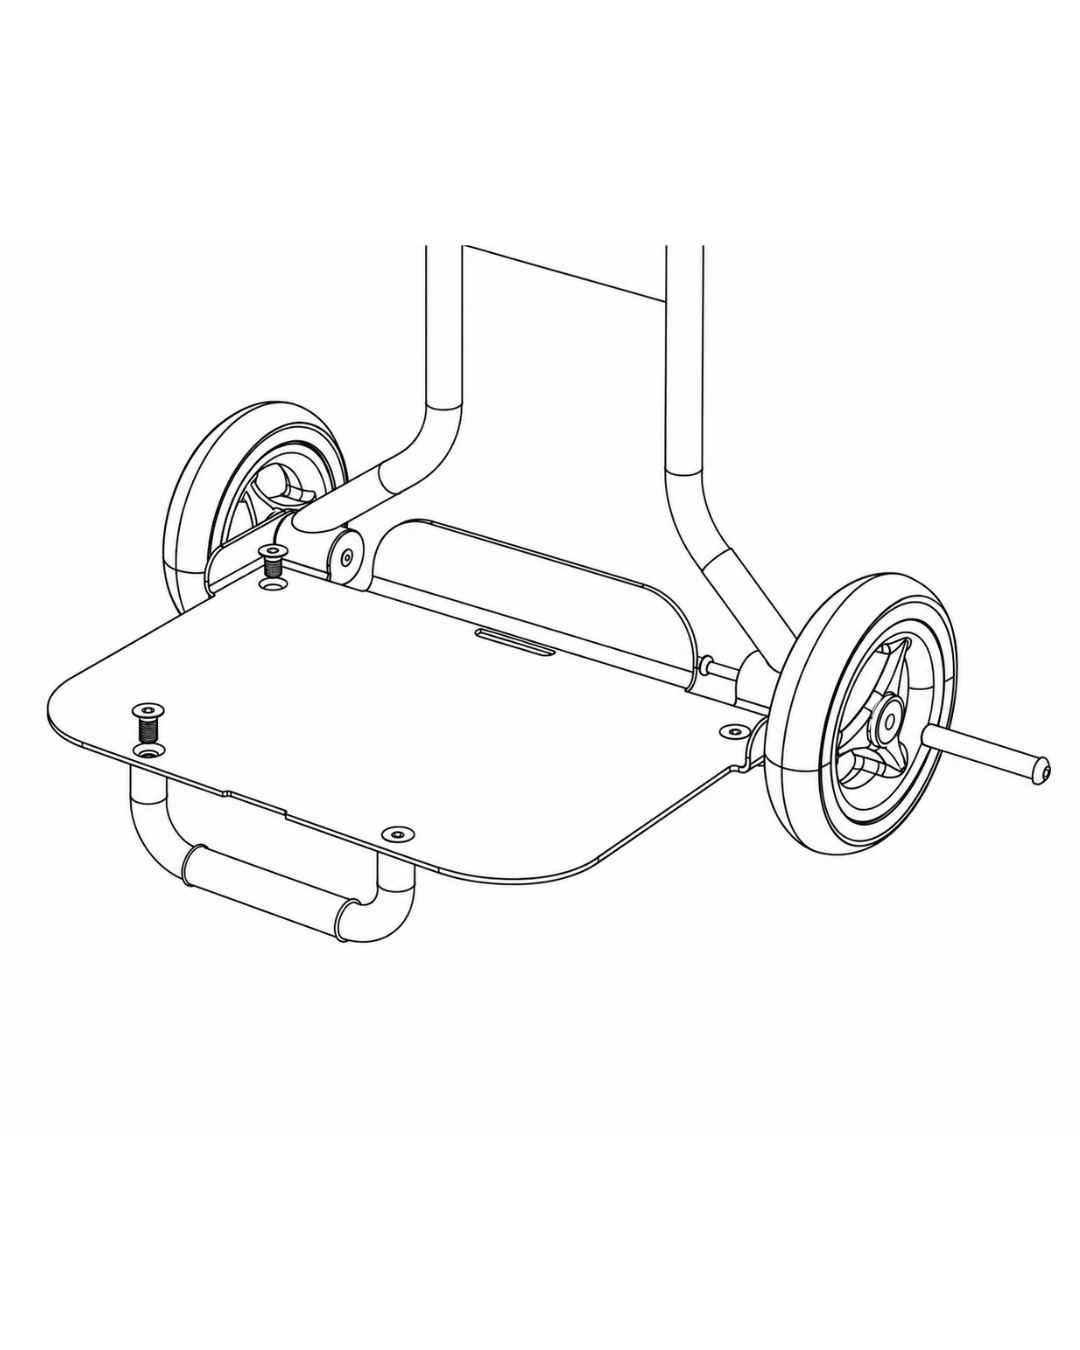
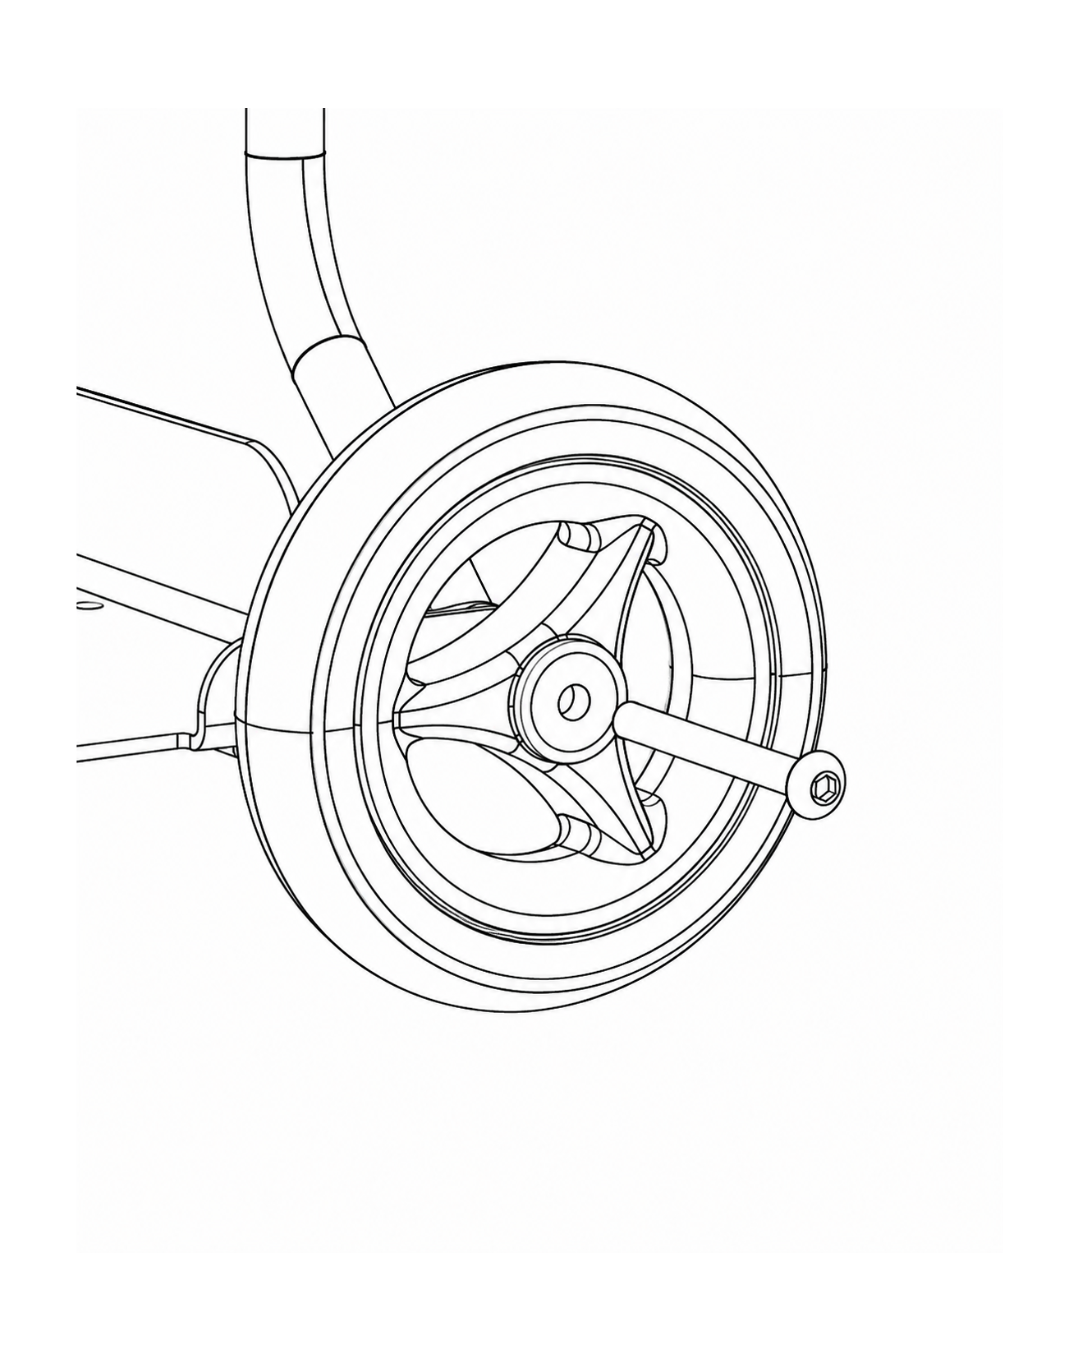
2
Attach the wheels
The axle bolts are inside the cardboard sleeve along with the hex keys. Each axle bolt is made up of two parts -- a long outer bolt and a small inner bolt. Start with one wheel. Make sure the smooth side of the wheel faces outward. Push the long part of the axle bolt through the wheel and through the axle hole in the frame leg. From inside the frame, insert the small inner bolt into the back of the axle. To tighten, use both small hex keys at the same time -- hold the inner bolt still with one key while turning the outer bolt with the other. Righty tighty, lefty loosy. Repeat for the second wheel.
2x Small hex keys
Axle bolts
3
Attach the base plate
Lower the base plate down onto the frame. Insert the remaining 2 x M8 countersunk bolts into the holes and tighten with the large hex key until the bolt heads sit flush with the surface.
Large hex key
2x M8 countersunk bolts
4
Attach the bag
Lower the bag over the frame so the internal base panel rests flat on the base plate. Connect the lower attachment points to the base first. For the top, remove the pre-attached bolts from the frame before fitting the bag. With the bag in position, reinsert those bolts through the bag and back into the frame, then tighten down. Once the bag is fully secured, slide the base board into the bottom of the bag. Curved corners face forward.
5
Attach the collar
Orient the collar with the snap buttons facing upward. Set it into the top opening of the bag and align the snap buttons on the collar with those on the bag. Press firmly -- the fit is intentionally tight and you may need to pull the bag fabric into place as you go.
6
Roll it
Grip the handle, tilt back onto the wheels, and go. You're done.
Frame Assembly
Pair text with an image to focus on your chosen product, collection, or blog post. Add details on availability, style, or even provide a review.

STEP 1
Attach the foot bar using 2 X large counter sunk bolts and large hex key.
STEP 2
Attach the base plate using 2 X large counter sunk bolts and large hex key.
STEP 3
Attach the wheels using axle bolts and 2 X small hex keys